It’s in, and I LOVE it! It was a long wait due to a delay with stocks of copper sheet, but the sheets are up and the shower recess looks fabulous.
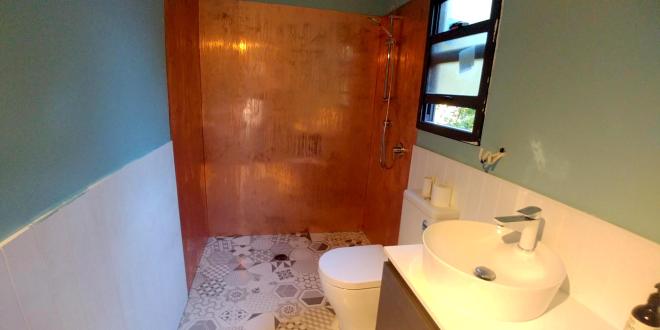
The bathroom vanity is installed and the hot water is on, so the bathroom is very nearly done. I now have a hot shower to use, which is bliss. Not only that, my wood stove has also been installed so things are getting cosy and civilised. It’s feeling much more like a house with these home comforts.
The Bathroom
For the 3-sided shower recess, based on some good advice from my builder/carpenter I ordered the copper sheets with a small fold along the two side-wall sheets, so that the back sheets overlapped in the corners. A friend helped me put up the sheets, which were stuck on with rather a lot of Sikaflex. The idea was to leave no gaps behind the sheets and laminate them onto the wall, so the Sikaflex was spread evenly on the wall with a small notched trowel. I put a coat of etching primer on the back of the copper sheets first to help them stick. We used a roller and high tech device made from some timber with a towel wrapped around it to push the copper flat onto the wall. The joins are all filled with chocolate brown silicon.
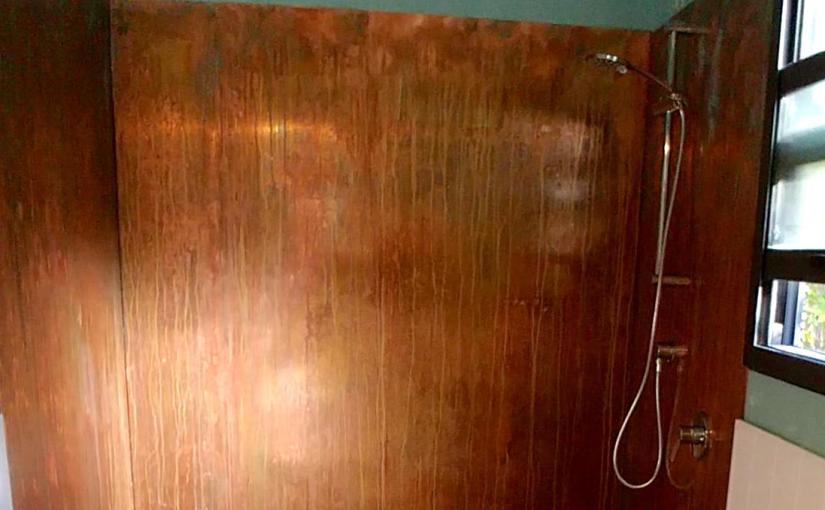
The copper was blindlingly shiny when new and would be a bit much for an early morning shower. My plan was always to make it darker and after playing with some test patches I sprayed on double strength white vinegar to oxidise it and get some interesting colours happening. I like the dripping look too, it seems appropriate for a shower. If you didn’t want the drip look you could oxidise the sheets when flat before sticking them up.
 Before: the shiny new copper before it was oxidised. Too bright for my liking.
My earthy rustic colour scheme is coming together. The photo on the left below shows the stairs and some of the bathroom with the copper and chocolate colours running through, and the nearby kitchen wall will also have an oxidised copper splashback which is an offcut from one of the shower recess copper sheets. That will sit above dark brown lower kitchen cabinets. Please excuse the painting drop-sheets on the stairs in the photo, I’ve still got one more coat of paint to do on the stair walls and also in the bathroom, but it’s been too cold to paint.


Left: the stairs and the bathroom colours all coming together. Right: a close up of the copper sheet oxidising from the vinegar. Some patches of teal patina are coming out, which match the wall colour. The brown colour will get a bit darker before I seal it.
I also still have to add trim to the white wall panelling (a top dado rail), window trim, and trim around the copper, plus add in the vintage bronze globe chandelier which is obviously a must for any bathroom with a copper shower. And then a mirror cabinet over the basin. It’s looking high end for a bathroom where most of the bits were bought in January sales or on ebay! And most importantly for me, it’s not all beige or white, it’s got some character.
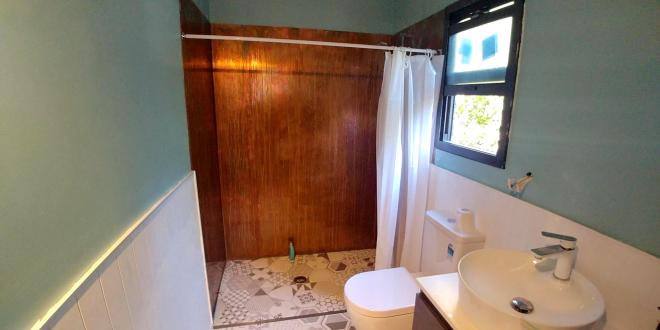 The final curtain will hang higher and be nicer fabric, this is a $7 plastic job for the short term. The hob on the floor is a strip of powder coated aluminium that I filled with silicon and stuck down, a recommendation by my tiler. Simple, unobtrusive and matches the tiles. I added PVC edges to the wood panelling and on the shower end I added a vertical line of oak trim, protected with two coats of primer then two coats of wet area paint, siliconed in. At worst that trim can be sacrificed and replaced if needed, and will protect the ply wall panelling.
The Wood Heater
Now that “Puff” my slow combustion wood stove is installed (as in Puff the dragon, I decided the stove is not big or nasty enough to be named Smaug), the house is warmer inside than out and I can get stuck into the painting. The heater is a Nectre MK1 wood heater and it burns like a champion and puts out good heat. I have about two years’ worth of wood on my block from the trees I had to remove to put my containers in, and while it’s not iron bark it’s a reasonably hard wood and burns well.
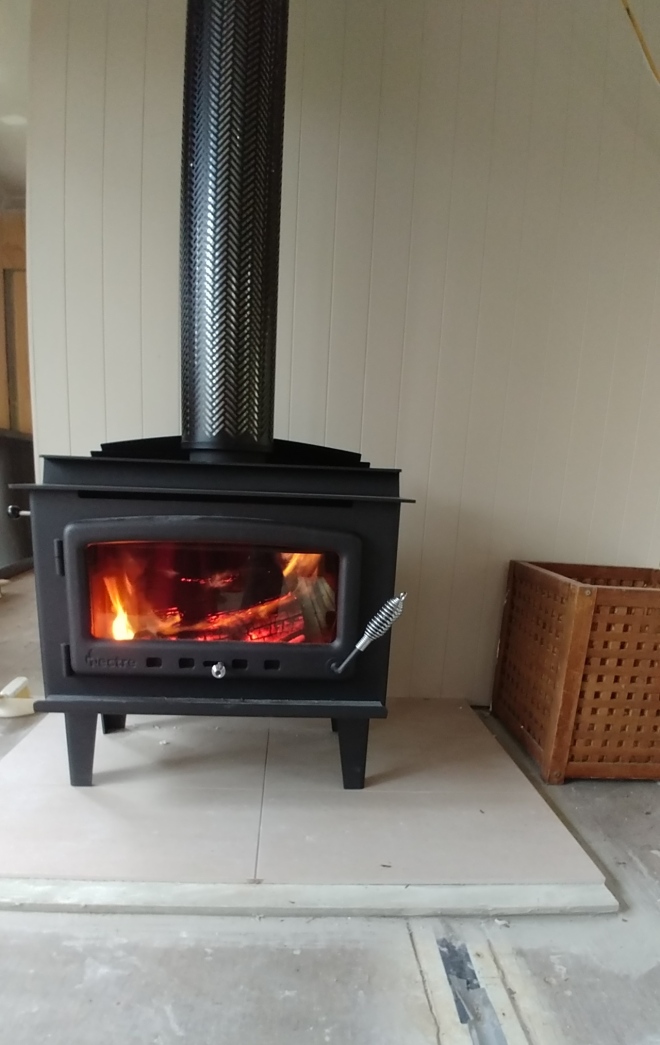 Aaahh, warmth in winter is a mighty fine thing. I think I’m in love with Puff. It has a cooktop and I’ve already slow cooked a stew on it – great for when we get blackouts due to storms up here in the mountains.
The wood heater installation was yet another learning curve. First up, you need to include your wood heater in the Development Application for approval before installing it, and the heater I included in my DA wasn’t being made anymore, darn it. The main requirement is that the heater must comply with new emissions standards so I just had to pick another one. However, I had a penetration cut into the steel container roof for the flue, back when the containers were modified, and that penetration was based on the specs for that heater; ie the size of the hole in the roof, and the position of the hole based on the clearance distance of the heater and flue from the rear wall.
To add some excitement, They Who Shall Not Be Named failed again and did not manage to put in a hole that was 250mm square – it was too small on one dimension. So all of that cut down my choices in a big way and resulted in yet more research on rear clearances of different heaters, heat shields, and smaller flues.
I had a few quotes for installation and they weren’t too bad until I was told you need a certified installer to do the job, otherwise you won’t get the tick from Council and you might not be able to get house insurance. In the end, I found a good installer who knew his stuff and managed to squeeze a too big round flue into a too small square hole, by standing on the stove and pushing it up through the ceiling with his back, so everything was done to spec. It was fun to watch a literal interpretation of “putting your back into it”.
A tip for anyone else who might be clueless like I was, wood heaters come with specs on how thick the hearth has to be and what thermal conductivity the material can have, so it isn’t a matter of just whacking down some tiles or buying a pre-made stone hearth like all the slate ones you see online at the moment. Based on the installation manual, I put down 15mm thick compressed fibre cement board first. To make things more interesting the hearth crossed the floor where the two containers join and the floor it wasn’t level. So I made a lovely pattern with different sized leftover timber spacers to get it level, then mixed up and troweled on a lot of cement base tile adhesive to fill the gaps and stick the FC sheet on with. I went searching through a couple of hardware stores as there were not many tile adhesives that were happy to be put onto timber, and the container floor is super thick plywood. The stuff I chose is also flexible, rubberised from memory, to allow for any movement of the containers. I’m not sure if that’s the standard way to build a hearth but it seemed to work and it appears to be as solid as a rock.


Left: small towers of different sized wood spacers were stuck down to level the floor where the containers join. Right: compressed fibre cement (FC) sheet went on as the first layer, then tiles on top. You can see the 50mm front edge I have to cover with trim.
Then I put tiles on top of the FC sheet using normal tile adhesive, there are plenty of tile adhesives that are happy to bind concrete based surfaces and ceramics. The tiles were a bargain $25 at Bunnings, yay! I chose to blend them with the wall colour as the floor will be darker and a black or dark grey hearth would look yuk. Having a pale hearth might turn out to be a mistake, but whatever colour you use you get charcoal and wood bits all over it anyway so I figure I’ll just clean it.
The heater installation manual said a 900x900mm hearth was fine but when I added up the minimum rear wall clearance, plus the stove depth, plus the required clearance in front, it added up to 960mm. Someone didn’t have a calculator when they wrote the manual. So I built a 960mm deep hearth, which is a bit annoying as 3 standard size tiles (600×300) make up around 900mm or 910mm if you space them out a bit. I still have to add a non-combustible trim to the hearth to cover the extra 50mm of FC sheet, which I’ll do once the floor goes in.
As usual it wasn’t a simple process, but the heater is in and I’m as happy as a pig in mud, or maybe a pig in the oven because the house is soooo warm. Now I shall paint, paint, paint to get ready for electrical fit-out in two weeks, and once the kitchen wall is painted I can put up the cabinets.
